
AY-281-W

Whether you own it or rent it, land is one of your highest-priced production assets. To get the most return from your investment, you need to insure adequate fertility. That's why soil testing should be a key part of any crop production program.
Studies at Purdue University indicate there are four major questions you should answer when reviewing soil sampling techniques:
The three principal factors to consider when deciding how often a field should be tested are the cation exchange capacity (CEC) of the soil; the cropping system, which is affected by the rotation, irrigation, and yield goal; and the soil test level.
If the soil has a high CEC, it will hold cation nutrients better and the pH will remain constant over longer periods of time. Therefore, soil testing may be done less often. However, if it has a low CEC (less than 7) some cations such as potassium (K+), magnesium (Mg++), and ammonium (NH4+) may actually leach through the root zone, and testing is needed more frequently. When fertility levels are low, testing should be done frequently to insure best utilization of added nutrients.
If you consider the differences in soil properties, such as pH, CEC, organic matter, and field management, then you realize soil sampling should be tailored to monitor these changes over a field.
Sampling by soil type, using soil survey maps or aerial photographs to show the different soil areas of a field, is an excellent way to sample. Adjustments can then be made when individual soil areas are large (over 25 or 30 acres) or past management indicates a change. Although sampling by soil type may not give quite as detailed information as a more complex grid system, it has the advantages of simplicity and much lower cost.
The key is consistency and getting the information back in time to use it. While factors such as weather and crop rotation can affect soil test results, these differences are generally small enough that reliable information can still be obtained regardless of when sampling is done.
Pick one time that best fits your personal program and try to sample at that time each year. This will minimize year-to-year variability and allow you to more accurately track the effect of your fertilizer applications over time.
Avoid sampling in mid-summer, especially on sandy soils, because pH can vary due to movement of salts with wetting and drying. This is more important where high rates of nitrogen have been applied. Also, plan ahead, and sample before seeding or liming on acid soils where a perennial forage crop, such as clover or alfalfa, will be planted. Avoid late winter sampling of heavy textured soils, since freezing and thawing tends to release potassium from clay and give unusually high soil test levels.
In most situations, October to December sampling for spring fertilizer applications, and March to April sampling for fall applications are preferred. These two time periods generally have the lowest amounts of testing variability associated with them. Give yourself adequate time to review the test results and plan the program before making fertilizer applications.
The answer is based both on the amount of soil mixing associated with your tillage system and how nitrogen (N), phosphorus (P), and potassium (K) fertilizers are applied.
Where a moldboard plow is used, nutrients and pH are found uniformly distributed throughout the plow layer. This suggests that where a plow is used in the rotation at least once every two or three years, samples for P and K fertilizer and lime recommendations should be taken to plow depth, around 8 inches. They can be taken most anywhere in relation to the crop rows, as long as you avoid that year's fertilizer bands.
In mulch tillage systems, including chisel and shallow till, disk- or field-cultivator based systems, some stratification of nutrients and pH can be expected. However studies in the eastern Corn belt do not suggest this stratification is inherently bad. On the contrary, concentration of nutrients in small areas and zones of varying pH should enhance nutrient availability. Soil samples for routine P, K, and lime recommendations in mulch till systems should be taken to a depth of 8 inches. Be careful to avoid fertilizer bands in the old row area.
In continuous no-till situations, nutrient and pH stratification is very distinct. In controlled traffic fields where the rows are always planted in essentially the same spot, you also find concentrations of nutrients, especially K, in the row area. Again, as with the other systems, samples for routine P and K recommendations should be collected to a depth of 8 inches. Samples should not be taken directly in the row area because of the high concentration of nutrients.
Nutrient stratification has not been a problem in most situations. However, there is some indication that in some long-term no-till fields, under drought stress, nutrient deficiencies can occur if the lower portions of the old plow layer have become nutrient deficient. Therefore, you may want to monitor nutrient status in the 4- to 8-inch deep zone in these fields, especially for K. If the K level in this zone drops into the deficient range, tillage to re-mix the nutrients in the surface or deep placement of K fertilizers could be used. Recent work in Minnesota has shown that deep placement of K is an effective means of overcoming this weather-related problem.
Sampling to measure soil pH for lime recommendations in continuous no-till fields or established forage stands should reflect the fact that lime is relatively immobile. Its effect will be confined to the surface few inches of soil, unless incorporated or deep-placed. Therefore, in continuous no-till fields where lime will be surface-applied, recommendations should normally be made based on a 4-inch sampling depth. This also will mean that the amount of lime needed in a no-till field will be half the amount that would be applied to a conventionally tilled field at the same pH.
In sampling, stay away from:

1. To take a soil sample you need a sampling tube, auger or spade, and a clean plastic pail. Get sample containers from the lab where you are sending the samples for analysis.

2. Sample different soils, or areas treated differently in the past. Get equal-sized cores or slices from 15 or more places in each sampling area using probe, auger, or spade. Do not mix light- and dark-colored soils together.
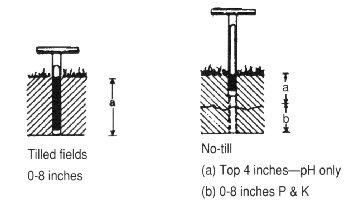
3. Take samples for P, K, and lime from the top 0-8 inches in tillage systems such as moldboard plow, chisel, and/or disk. Take samples for P and K from the top 0-8 inches in no-till fields and forage stands. Take samples from the top 0-4 inches for lime only in no-till fields. No-till fields which will be plowed periodically should be sampled to plow depth.
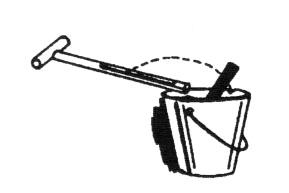
4. Place cores or slices in a clean plastic pail. Mix them together thoroughly, breaking up the cores or slices. If soil is muddy, dry it before mixing. If soil crumbles easily, dry after mixing.
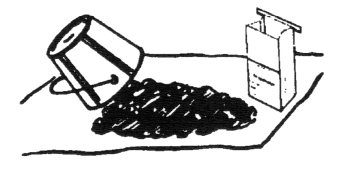
5. Spread mixture out on clean paper to dry. Do not heat in the oven or on the stove. Do not dry in places where fertilizer or manure may get in the sample.
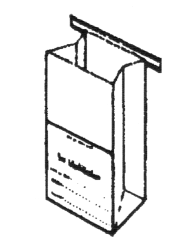
6. Fill the sample bag to the line with air-dry soil. Discard the rest. Label and number the sample container.
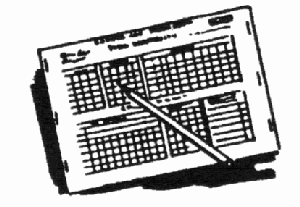
7. Identify the sample and record the cropping and fertilizer information requested using a field and cropping information sheet provided by the lab doing the analysis.
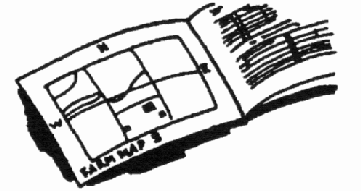
8. Draw a field sketch or farm map on a separate sheet and keep it in your files for your records, and to assist in developing your management plan.
Important! Your recommendations will be no better than the information that you give.
Make sure all forms are filled in legibly and all copies of a multiple form can be read.
Check all columns that apply to your sample and provide the information requested for each sample.
Nitrogen recommendations are made based on past cropping history as well as on soil properties.
Follow the mailing instructions from the lab you are working with and clearly label all materials with your name.
Record the results of your soil tests along with actual fertilizer applications. The Crop Production Record keeping System, ID-198, is one method of keeping this information. In the series of tables you can record soil test results, nutrient and pesticide applications, and yields, over several years. The pesticide table meets federal requirements for recording restricted-use pesticide applications. The Crop Production Record keeping System is a useful tool for organizing information needed to make economically and environmentally sound management decisions.
The following publications may be helpful. Publications are available from your county Purdue Cooperative Extension office or from Media Distribution at 310 S. Second Street, Lafayette, IN 47901-1232; phone 317/494-6794.
ID-198 Crop Production Recordkeeping System $7.50
AY-239 Role of Micronutrients in Efficient Crop Production
AY-238 Fundamentals of Cation Exchange Capacity (CEC)
RR 2/95
Cooperative Extension Work in Agriculture and Home Economics, State of Indiana, Purdue University and U.S. Department of Agriculture Cooperating. H.A. Wadsworth, Director, West Lafayette, IN. Issued in furtherance of the Acts of May 8 and June 30, 1914. It is the policy of the Cooperative Extension Service of Purdue University that all persons shall have equal opportunity and access to our programs and facilities.